


1600 lumen Trionic LED-frontlykt med batteripakke
Denne håndboken viser både hvordan du fester lysholderen og lyset på en Walker (venstre kolonne nedenfor) og også hvordan du fester dem på en Veloped (høyre kolonne nedenfor).
På bildet til venstre viser A festedelene til holderen for en Walker (2 skruer + 2 skiver). B viser festedelene til holderen for en Veloped (1 skrue + 1 riflet mutter + 1 mutter).

Feste lysholderen
Instruksjoner for en rullator
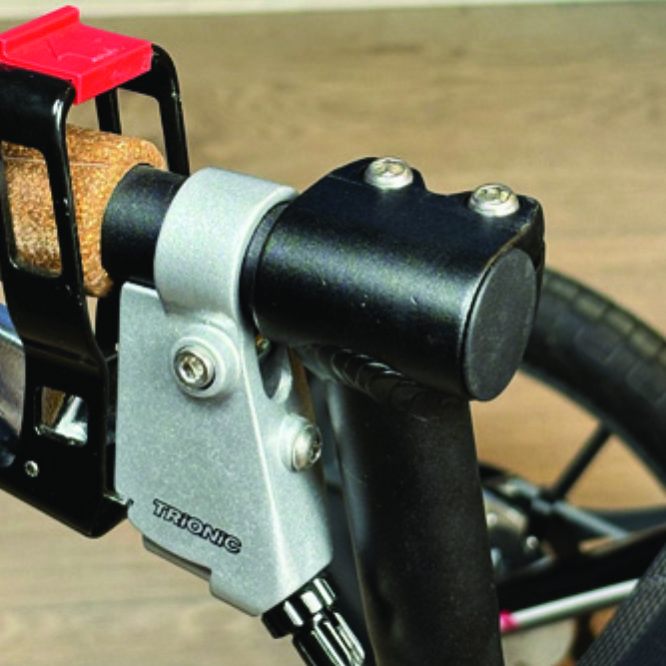
A1. Finn de to skruene som klemmer fast greprøret på toppen av det svarte halvvertikale røret, som er plassert foran bremsespaken.
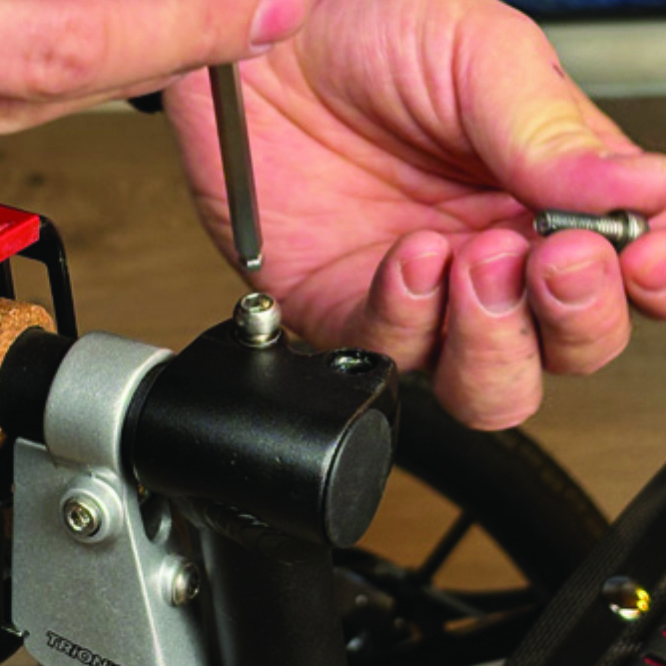
A2. Løsne begge skruene med 5 mm unbrakonøkkelen som følger med LED-lyset.
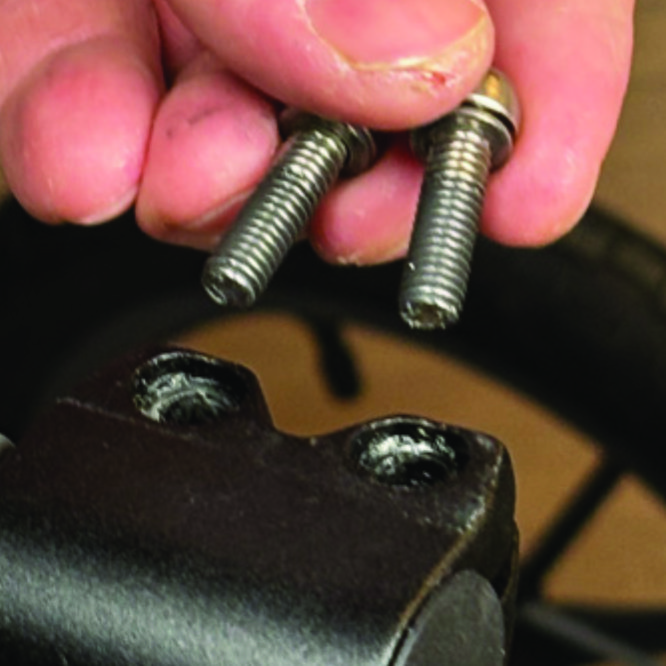
A3. Fjern de to skruene fra grepklemmen.
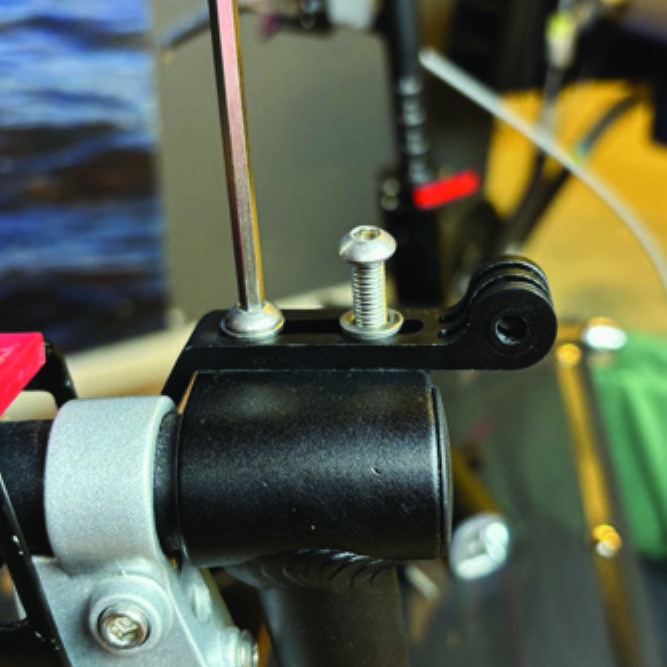
A4. Plasser lysholderen oppå grepklemmen, med det sirkulære og slissede lysfestet pekende fremover og oppover. Før de to skruene med skiver inn i hullene på klemmen.
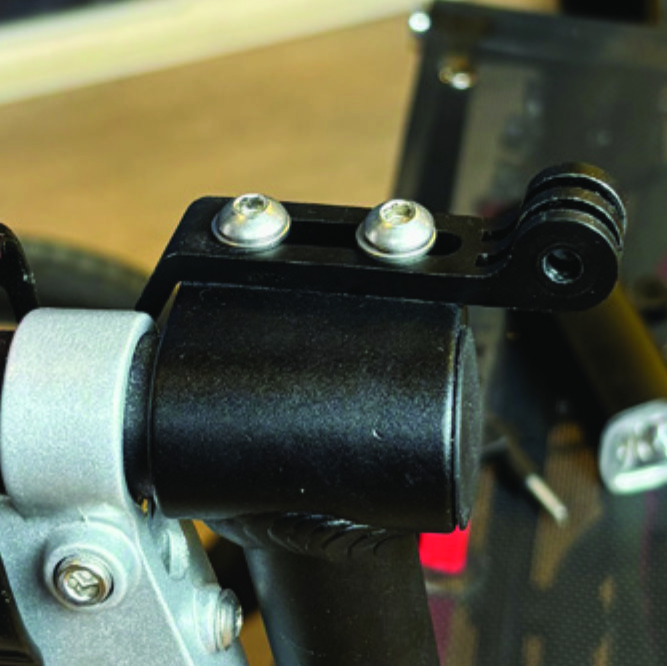
A5. Stram de to skruene med 5 mm unbrakonøkkelen. MERK: Det er viktig at du strammer skruene ordentlig, da de fester håndtaksrøret med gummigrepet og bremsespaken.
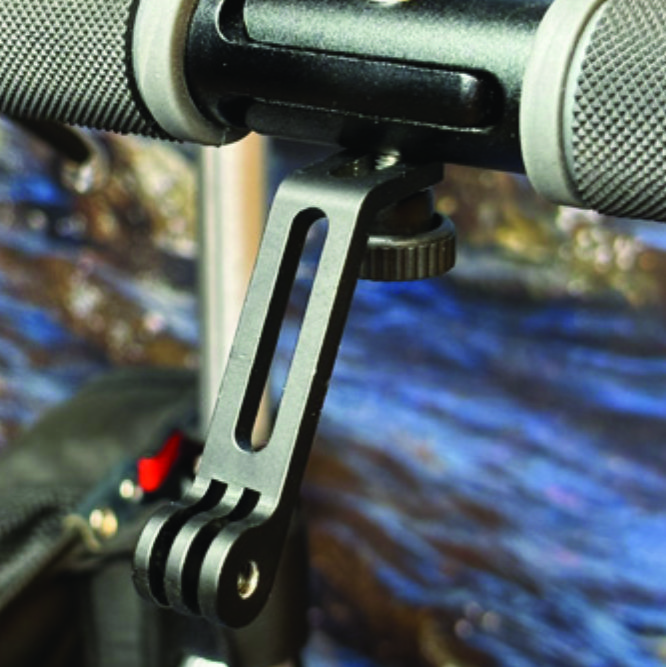
Instruksjoner for en Veloped
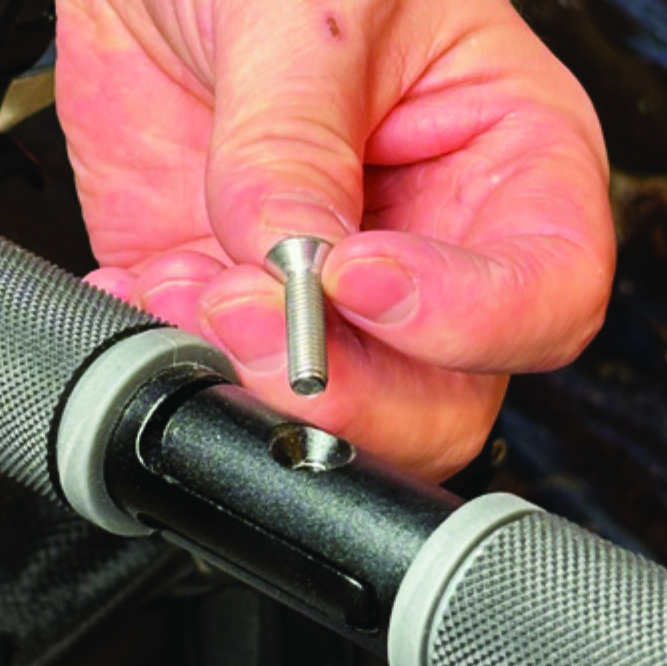
A1. Finn skruen på det midtre foldbare hengslet på den U-formede grepsstangen på Veloped. Skru ut skruen med den medfølgende 4 mm unbrakonøkkelen og fjern den.
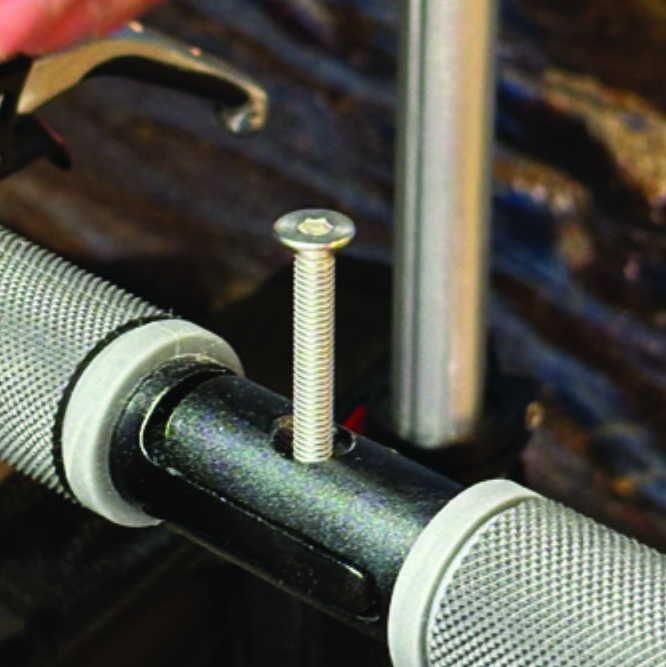
B2. Bytt ut den gamle skruen med den lengre skruen som følger med LED-lyset. Fest den lengre skruen til hengslet og stram den til med 4 mm unbrakonøkkelen.
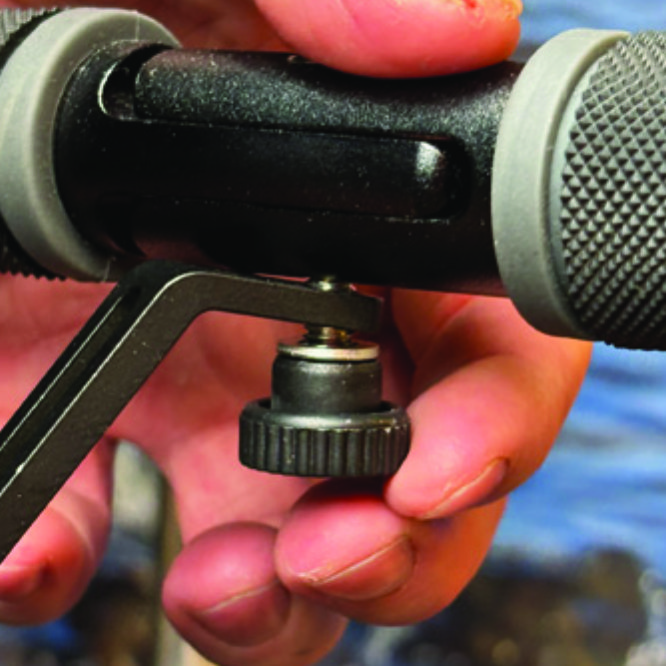
B3. Fest den korte, vinklede enden av lysholderen til den nedre enden av skruen, på undersiden av den U-formede grepstangen. Holderen skal peke nedover. Fest holderen med én skive og den riflede mutteren som du strammer med fingrene.

B4. For en sikrere feste av holderen, og for å unngå at holderen utilsiktet vrir seg sidelengs, bytt ut den riflede mutteren med den medfølgende rustfrie stålmutteren og stram den til med en 10 mm skiftenøkkel.

B5. Dette bildet viser lysholderen riktig montert.
Feste LED-lyset til holderen
Instruksjoner for en rullator

A6. Identifiser den sirkulære forenden av lysholderen, med to spor for å feste lyset.
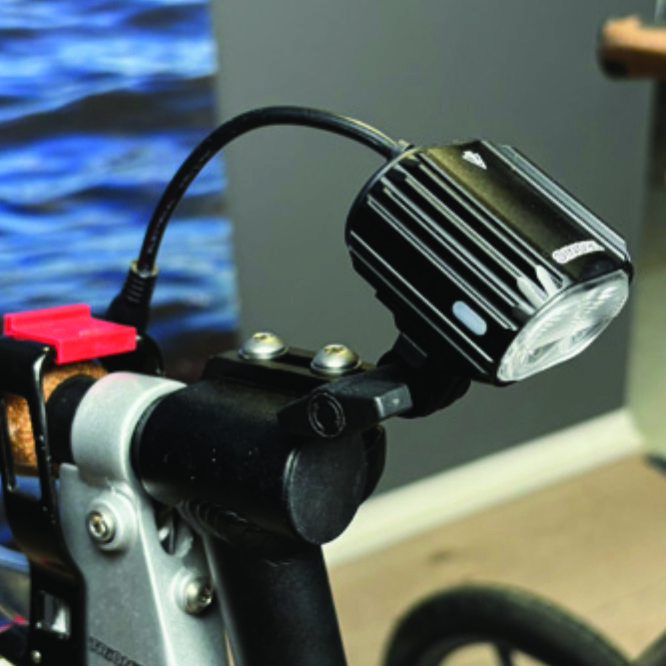
A7. Skyv den sporede braketten på lykten inn i sporene på holderen og sørg for at de er på linje. Sett i Walkerens bevegelsesretning, før den medfølgende vingemutteren inn fra venstre og stram den til.
Instruksjoner for en Veloped
B6. Finn skruen på det midtre foldbare hengslet på den U-formede grepsstangen på Veloped. Skru ut skruen med den medfølgende 4 mm unbrakonøkkelen og fjern den.

B7. Identifiser den sirkulære forenden av lysholderen, med to spor for å feste lyset.
Plassere batteripakken
Instruksjoner for en rullator
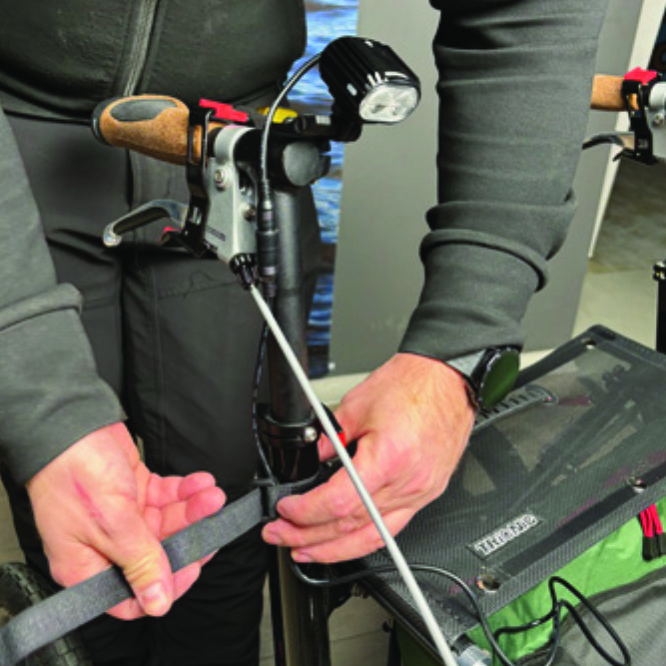
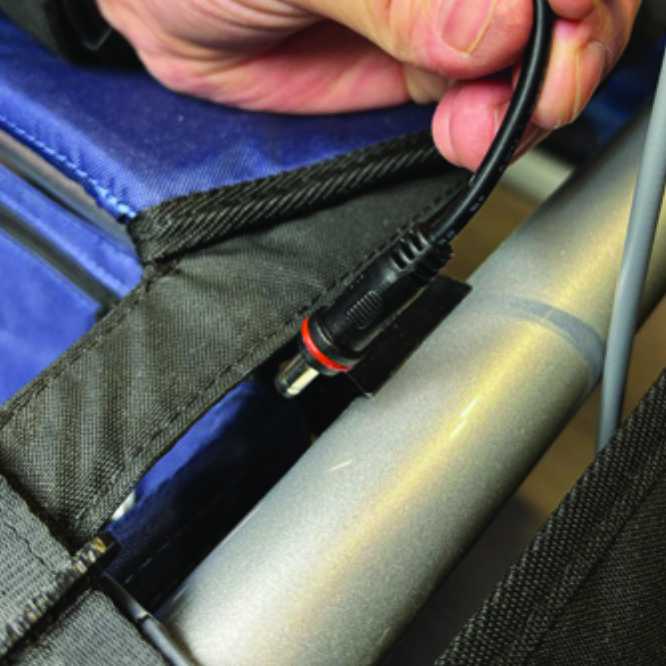
A8. Trekk den lengste forlengelseskabelen langs det semi-vertikale griperøret på Walker og fest den med den medfølgende borrelåsstroppen.
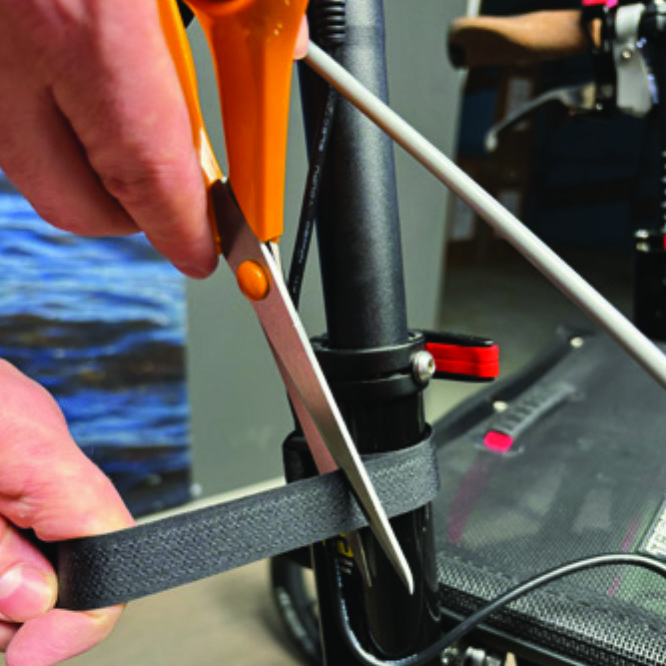
A9. Du kan klippe av den overflødige lengden på borrelåsstroppen med en saks.
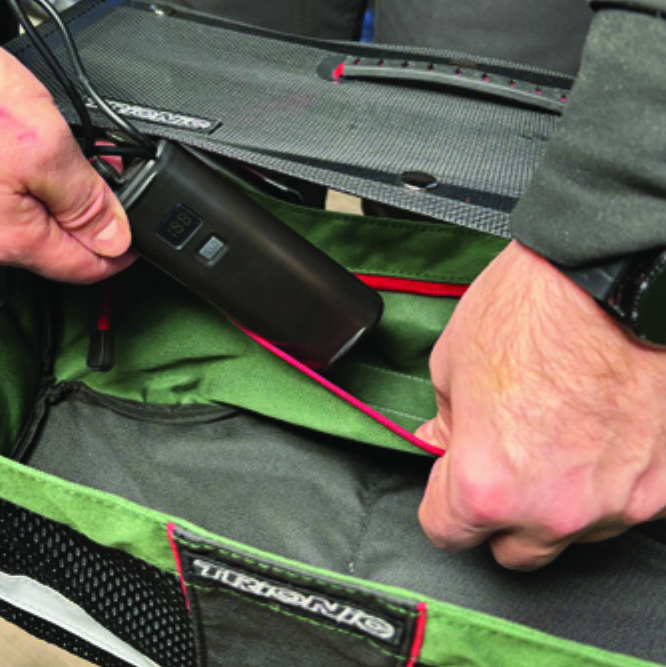
A10. Plasser batteripakken i den bakre glidelåslommen på kurven.
Instruksjoner for en Veloped

B8. Trekk den lengste forlengelseskabelen langs den U-formede grepstangen på Veloped-enheten og fest den med den medfølgende borrelåsstroppen.
B9. Du kan klippe av den overflødige lengden på borrelåsstroppen med en saks.
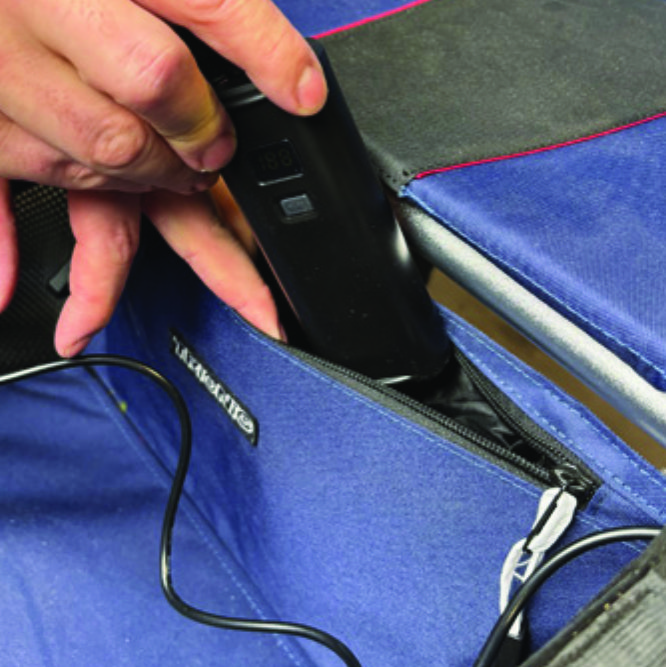
B10. Plasser batteripakken i den bakre glidelåslommen på kurven.
Pakken inneholder

Slik betjener du lyset


